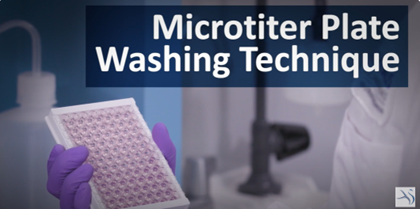
Variability concerns with your ELISA? Revisit your plate washing technique.
Proper washing technique is essential to reduce variability and eliminate background in your ELISA. If you’re using automated washing equipment and/or experiencing higher variability than desired, read on and watch our video to get your results back on track.
Advantages of manual plate washing
Though the goal of washing your ELISA plate is to remove unbound reactants, washing too aggressively can also cause dissociation of antibody-bound analyte in a highly variable manner, resulting in both lower absorbance values and higher %CV values. On the other hand, incomplete removal of residual liquid (as often occurs with automated washers) can contribute to higher assay background, which can be especially problematic for HCP ELISAs, as they have naturally higher baseline absorbance values.
For these reasons, our experts recommend manual washing for Cygnus ELISA kits. This procedure is brief, easily mastered, and doesn’t require any special equipment. All that is needed is low lint absorbent paper, and a wash/squirt bottle with the beveled tip trimmed off to ensure generous yet gentle flow of wash solution.
Getting started: prepare your wash solution and work area
Empty contents of wash concentrate into the 1 L wash bottle and fill with distilled water. Place the absorbent paper on a clean bench surface next to your sink.
| TIP: Do not use any other wash solution other than that provided with your ELISA kit, as it may negatively impact assay performance. |
Step 1. Discard the liquid from the plate
Hold the microtiter plate from the bottom with the thumb in the middle of one side and the fingers on the other side. You can use your thumb and fingers to grasp the tabs on the ends of the middle strip or strips to avoid having any strips fall out of the strip holder. Working over the sink, invert the plate and rapidly accelerate your arm and hand downward in one smooth motion. Abruptly stop your arm to force the liquid from the strips into the sink. When done properly, you should not get any liquid on your fingers or on the outside of the strip wells or plate holder. Repeat the dumping motion a second time.
TIP: Label coordinates of each strip if you are concerned that they will fall out of the strip holder. |
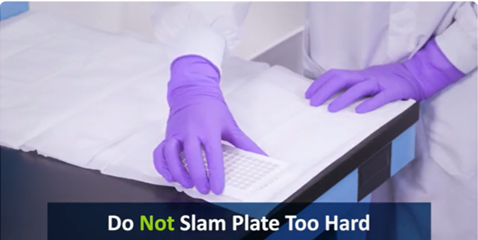
Step 2. Blot and tap the plate
Immediately blot the inverted plate onto the blotting paper. Move the plate to an unused section of the blotting paper, and firmly tap the plate 3 times over unused areas of the paper. Do not bang the plate too hard, as too much force may result in variable dissociation of the antibody/analyte complex due to the transfer of unequal amounts of shock energy across the plate.
Step 3. Wash the ELISA plate
Using the squirt bottle filled with diluted wash solution, fill all wells until they are overflowing, starting at the top of the plate and moving toward the bottom. As soon as the last well is filled, immediately discard the solution and tap the plate as described in steps 1 & 2.
TIPS: Do not worry about overflowing the wells, as you will wipe off the bottom of the wells before adding substrate. |
Repeat the washing procedure 3 more times for a total of 4 washes. With the second and fourth washes, start by adding the wash solution from the bottom to the top of the plate. This ensures that the total dwell time of wash solution will be essentially the same for all wells. Additional wash steps should not be necessary and may dissociate antibody-bound analyte, reducing sensitivity.
After the last wash, blot/tap the plate as described in steps 1 & 2. Let the plate rest upside down for about 20 seconds to thoroughly drain. Firmly tap the plate again 4 times.
TIP: rotate the plate 180° in your hand between each tap. This rotation ensures that the ends of the plate receive on average the same energy and impact from the tapping motion. |
Step 4. Wipe off remaining solution
Wipe the bottom outside of all wells with clean absorbent paper to remove any remaining wash liquid. Wells are now ready for substrate addition.
Bring the ELISA plate away from the sink to your workstation and add substrate immediately after washing.
| TIPS: Do not let the wells dry out, or enzymatic activity will be compromised. Add substrate away from the sink location, as the washing procedure can generate aerosols that could recontaminate the wells or your substrate. |
Watch our troubleshooting video below to help you master the exact technique!
Have more questions or need help with your assay troubleshooting or qualification? Visit our FAQ page or contact us!